In my last post, I defined the basic differences between themes and templates in Microsoft Office apps. Over the next several posts I’ll talk about how to use them to create a polished, professional looking presentation.
I use Microsoft Office 2016 for the Mac. Instructions might vary for you if you are using a different version or platform. If you want to see a larger view of any of these screen shots, simply click on the image.
Applying the theme
Let’s start with something simple by creating a new blank presentation. Once you create a new presentation, select a theme from the Design tab to apply one of the built in themes.

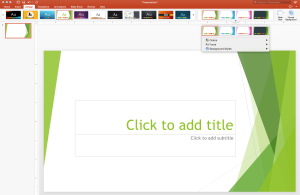
Here I have chosen the Facet theme. The slide now has green, triangular shapes framing the title block.
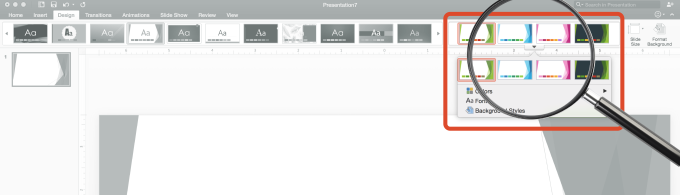
Below, notice different color variations of the theme to the right of the themes on the Design tab. (Not all themes have these variations, but when they do, it provides another way to customize the theme.)
Below I have opened an existing presentation and applied the darkest version of the Facet theme.
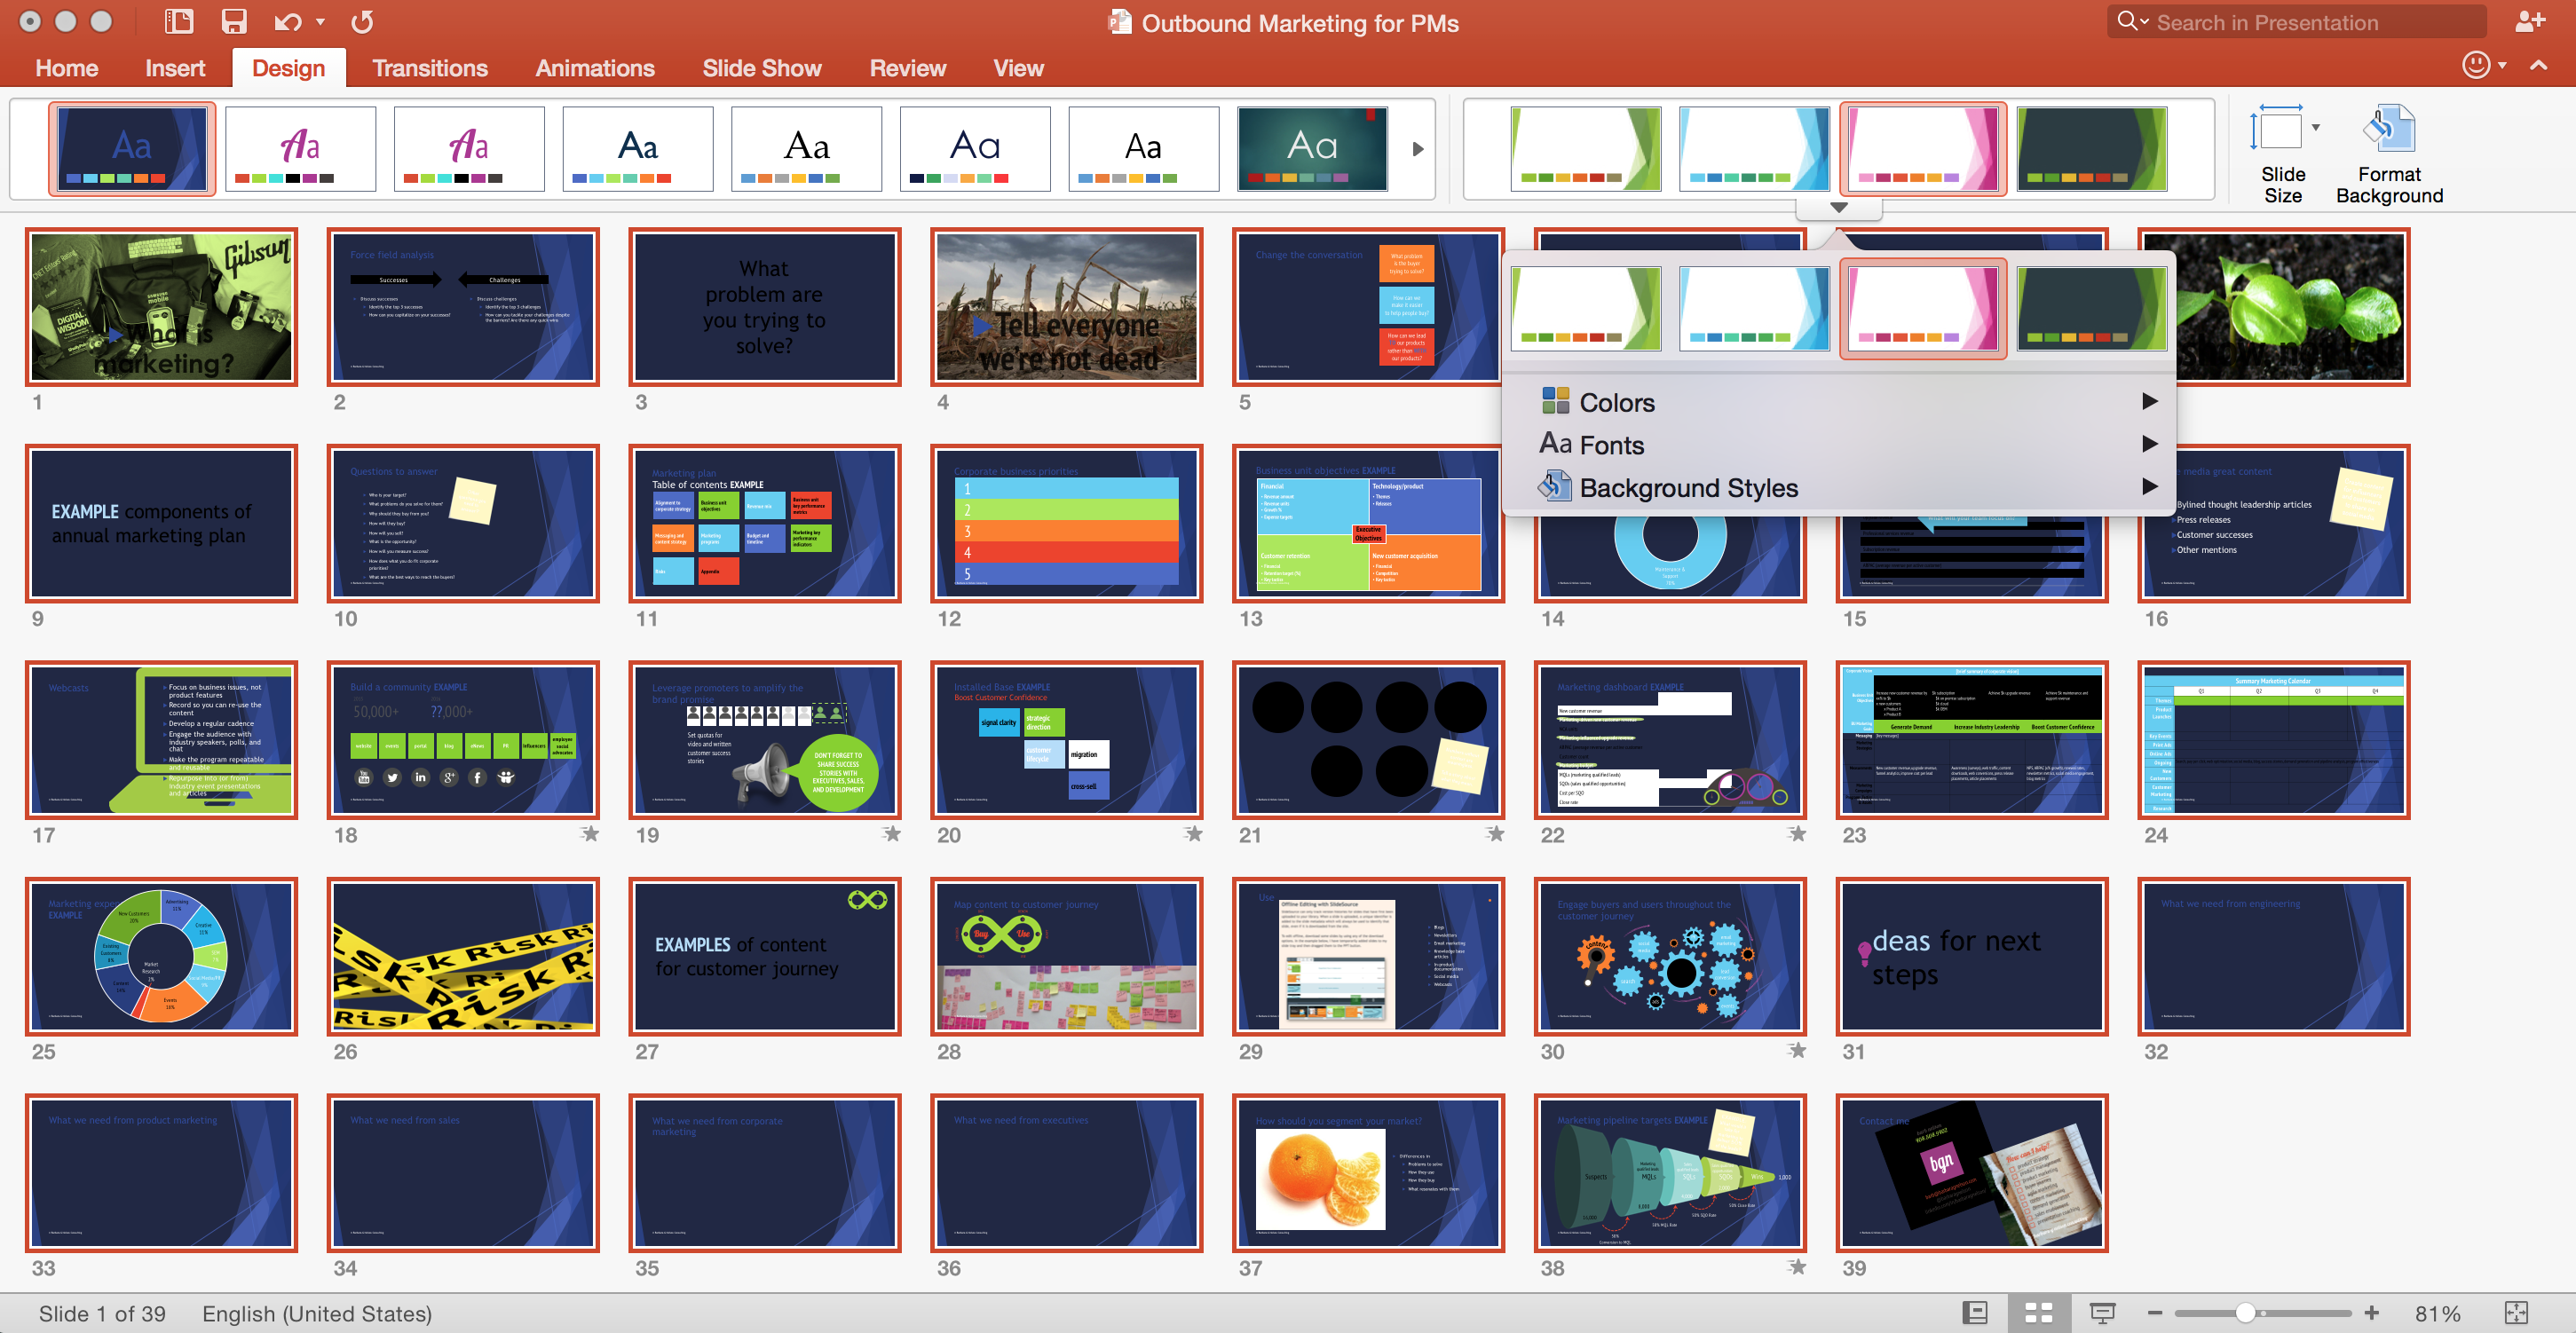
If you use the Slide Sorter view, you can quickly see the impact of applying a theme to an existing presentation. You can change the color palette, fonts, and background styles, also. (More on changing these in the slide master below.)
Theoretically, applying a theme shouldn’t take a long time. But you have to look at each slide to see what effect the change makes. Remember that a theme can contain colors, fonts, and background styles that are likely different from the presentation you’re updating. Look for:
- Word wrapping: Since letter sizes vary from font to font, text will not wrap the same for every font.
- Colors: When you build a presentation and assign colors, if you choose colors from the theme colors, PowerPoint assigns a color slot rather than the actual color. For this example, the raspberry color that is highlighted is the second dark text/background color in this theme (column 4).
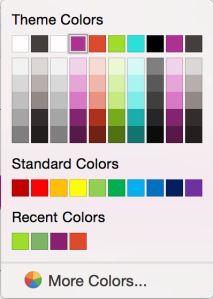 If I change to a theme where the first color in the 4th column is dark blue, everywhere in the presentation where I assigned the raspberry in the 4th column would change to dark blue.Wherever you see colors that don’t change when you apply the theme, check to see whether you applied a “Standard Color” or “Recent Colors” that are outside of the Theme Colors palette. Even if they have the same value (such as the RGB numbers assigned to the color), if they were not assigned from the theme colors, they will not change when you change themes.Also, look at objects that were created outside of PowerPoint. Do the colors work with this template? You may need to go back to the source file (such as Illustrator or Photoshop) and use a different color scheme to match your new template.If you are changing from a white background to a colored background, objects may need to be changed to look good. Especially if you have a photo with a white background making the object look cut out. You may need to change the photo background to transparent rather than white to look good on a dark background. OR, maybe it is better to select one of the white backgrounds for an individual slide so it looks right.
For example: Before
 After
After 

Creating a slide master and slide layouts
Slide masters and layouts help you add a designer touch to your presentations beyond colors and fonts. To see the slide master and layouts in your presentation, go to the View tab and select Slide Master.

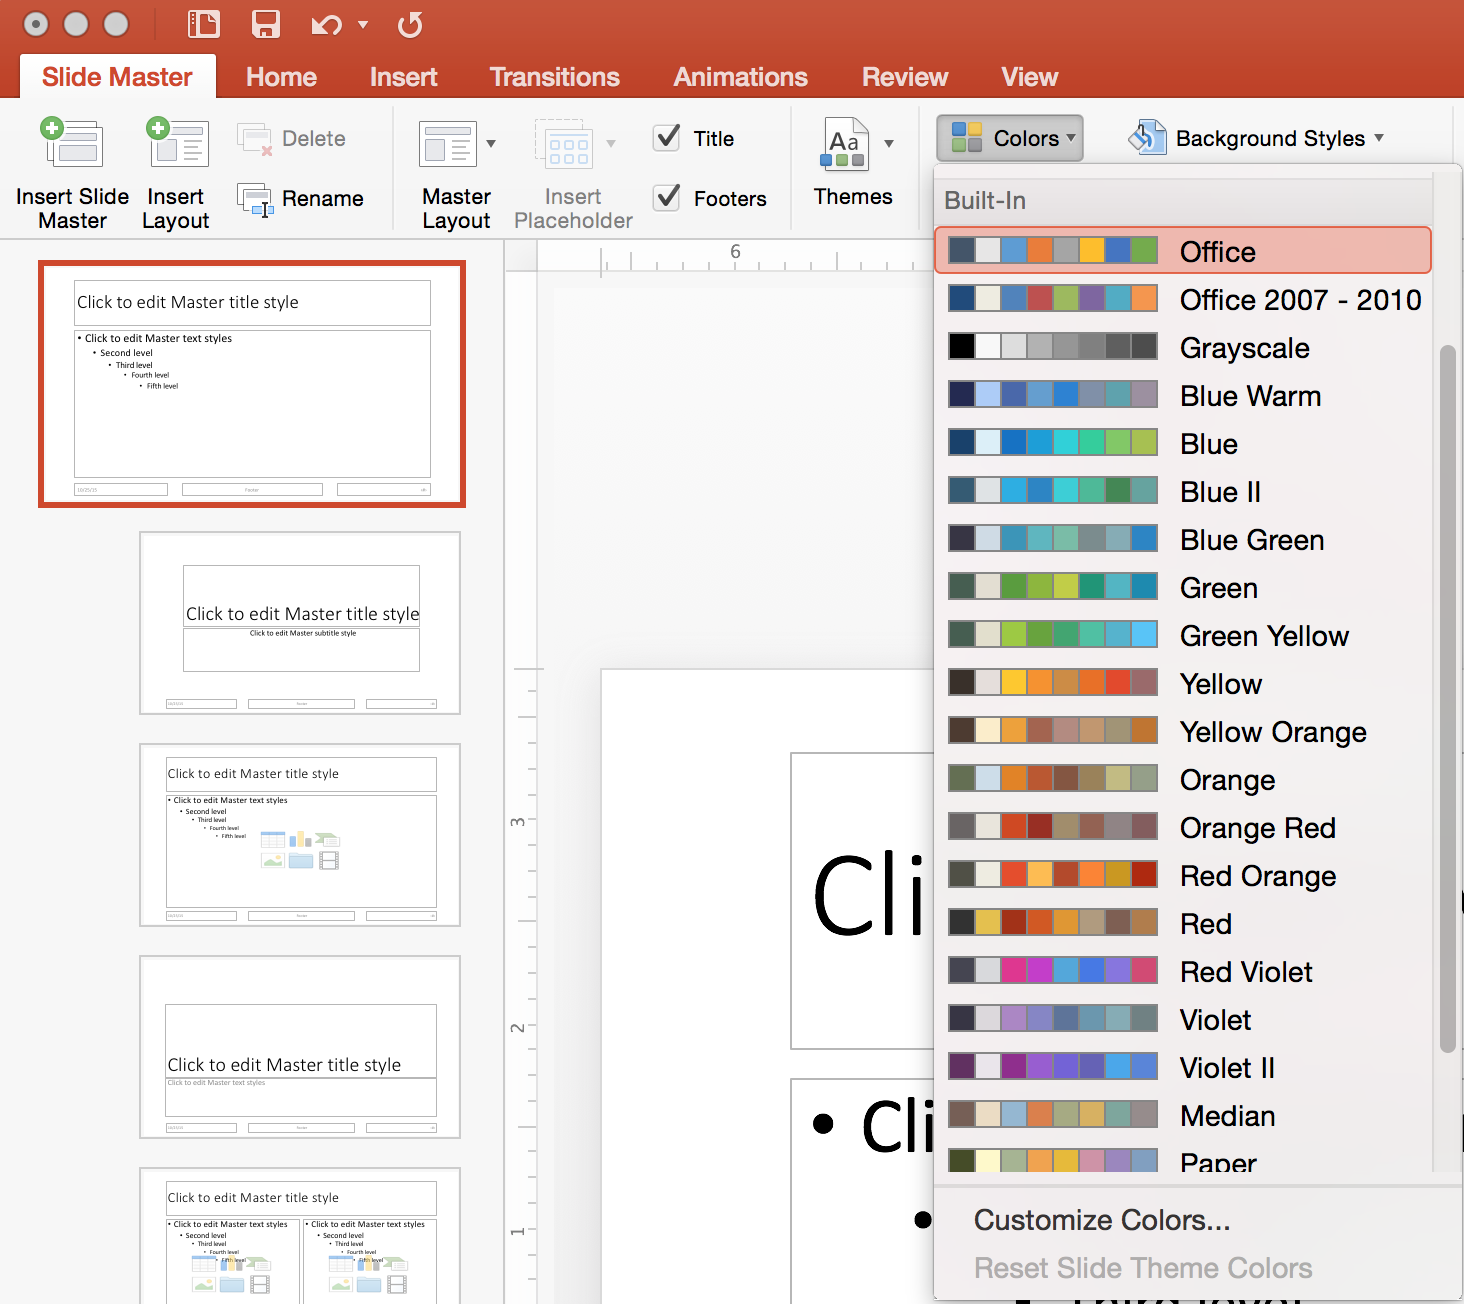
From the Slide Master tab you can choose the theme colors for this master.
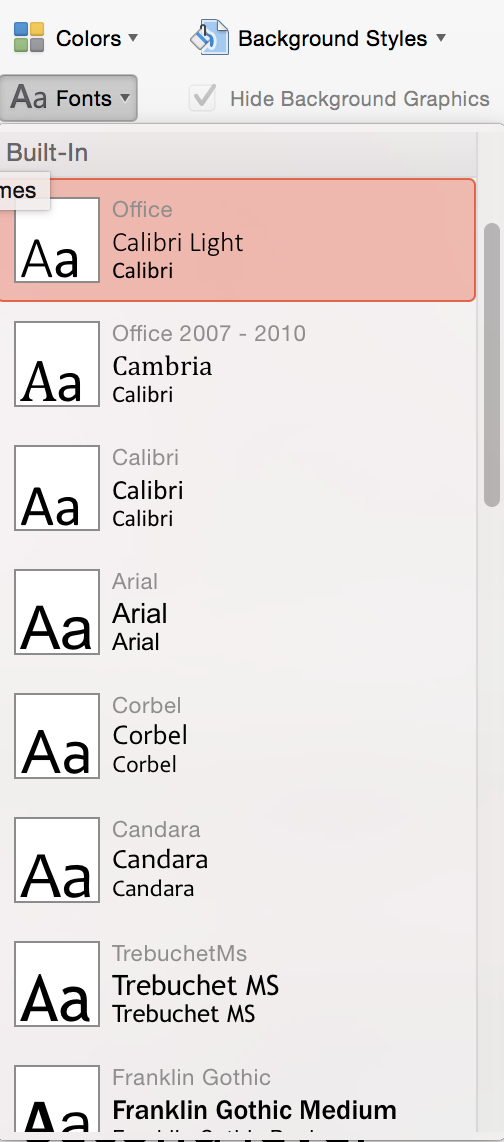
You can also choose the default fonts for the heading and body text of your presentation.
You can customize theme colors and create new font pairs* to further tailor your theme.
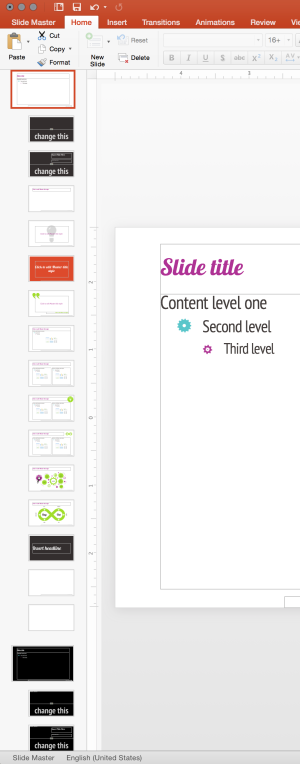
Each slide master has multiple layouts for presenting different types of content such as graphs, photos, bullet slides, and tables.
TIP: If you want to change the title and content formatting for all layouts, change it on the first slide which is the master layout.
Advanced tips
Multiple slide masters
For each slide master you can apply a different theme, different theme colors, and different fonts. One way to use this feature would be to create different background colors depending on the type of room you’ll be in. When you’re in a smaller, well-lit room, a light background is easier to read. In a larger keynote ballroom or auditorium where the room may be darker, a dark background works well. Although Guy Kawasaki says go big and go black (implying ALWAYS), it really depends on the venue and the types of slides you’ll be presenting. I love rules, but I also love breaking rules when it makes sense. Sorry Guy.
Here are some of the layouts in one of my themes.
To create the second slide master (black), I copied the first one (white) and pasted it at the end. That created the same set of slide layouts, with the same names. This makes it easier to switch back and forth between masters without having to do a lot of manual application of the slide layouts.
Then on the first slide (the master) I changed the background from white to black and fixed the title and content font colors to white (I was hoping PowerPoint was smart enough to switch to the light color, but it didn’t.)
Because I designed this presentation with a white background to begin with, some of my graphics didn’t work that great just switching from white to black. I had to manually tweek many of the slides and some images just didn’t work.
Creating unique layouts
I like adding some graphical elements that act like sign posts indicating what type of content the viewer is seeing. Although most of the themes that are included with Office have a lot of graphical elements on the slides that are decorations rather than meaningful (like Facet in the example above), I like more simplicity on my slides so the decorations don’t compete with the content. For example:

I typically don’t like to clutter my theme with a lot of content slides even if the content will be used in multiple presentations. Those belong in templates (more on that in a future post). But you may notice my content marketing and journey slides above. The reason I put those in my theme is because I occasionally make revisions to these diagrams that I often use in my presentations. By putting these as slide layouts, I simply need to modify the layout, save the theme, and apply the new theme to any presentation using these slides.
For a PowerPoint ninja like me, I am very excited by a new service I am using that solves this problem in a different way. It is called SlideSource and each slide in your presentation becomes an object that can be used in multiple presentations. If you need to change it, you change it once and any presentation using that slide can be updated to use the new version. I haven’t completely changed my habits yet to take advantage of all of the capabilities of this cool product but hope to write more about it in the future.
Other useful links about themes:
All about themes, Quick Styles, cell styles, and background styles
Footnote* Creating new font pairs (for heading and body) does not work right now on PowerPoint 2016 for the Mac. My workaround for creating new font pairs so they will appear in the list of Custom fonts is to do it within PowerPoint on a PC, save the xml file with a name easy to find, copy the file to my Mac, and put it into the Theme Fonts folder which is not that easy to locate. Klugy at best. If I try to modify the xml file using the text editor on the Mac, it does something to the xml file that causes the changes to be ignored.